

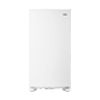
Moving or Adjusting the Shelves - Top Freezer Refrigerator
Possible Solutions
How to remove and replace the shelves
NOTE: If your shelf type is not listed below, please reference your Owner's Manual for your specific model's instructions.
The shelves in your refrigerator are adjustable to match your individual storage needs. Storing similar food items together in your refrigerator and adjusting the shelves to fit different heights of things will make finding the exact item you want easier. It will also reduce the amount of time the refrigerator door is open and save energy.
To remove and replace a refrigerator shelf (Type 1):
- Remove items from the shelf.
- Slide the shelf straight out to the stop.
- Depending on your model, liftback, or front of the shelf past the stop. Slide shelf out the rest of the way.
- Replace the shelf by sliding the back of the shelf into the track in the wall of the cabinet.
- Guide the front of the shelf into the shelf track. Be sure to slide the shelf all the way.

To remove and replace a refrigerator shelf (Type 2):
- Remove the shelf/frame by tilting it up at the front and lifting it out of the shelf supports.
- Replace the shelf/frame by guiding the rear shelf hooks into the shelf supports. Tilt the front of the shelf up until rear shelf hooks drop into the shelf supports.
- Lower the front of the shelf and make sure that the shelf is in position.

To remove and replace a freezer shelf (Type 1):
- Remove the shelf/frame by lifting the entire shelf slightly and moving it to the left-hand side.
- Tilt the right-hand side up and out of the shelf supports.
- Replace the shelf/frame by inserting the left-hand end into the shelf supports. Then, lower the right-hand end of the shelf and insert it into the shelf supports.
NOTE: The shelf should lower slightly and lock into place. If the shelf does not appear stable, make sure both ends of the shelf are inserted into the shelf supports.

To remove and replace a freezer shelf (Type 2):
- Lift the front of the shelf to raise the shelf tabs up and out of the opening in each shelf track. Slide the shelf out the rest of the way.
- Replace the shelf by tilting the back end down to align the back shelf tab under the track on each side of the freezer.
- Gently push the shelf into the freezer until the two center shelf tabs are positioned within the opening in each track — lower the shelf to rest on the shelf tracks.

Still need help? Contact us or schedule service.
Please contact us or click below to make an appointment from our preferred list of service providers for service on your appliances.
United States
Canada
Interested in purchasing an Extended Service Plan?
Please click below to learn more on how you can save up to 25% on New Appliance Extended Service Plans within 30 days of your appliance purchase.
United States
Canada
If you would like to download or view product literature for your appliance, please visit our Manuals and Literature page.