

Installation of Water Line - Dryer
Connecting the Inlet Hose
The dryer must be connected to the cold water faucet using the new inlet hoses (not supplied). Do not use old hoses.
NOTE: Replace inlet hoses after 5 years of use to reduce the risk of hose failure. Record hose installation or replacement dates on the hoses for future reference. Periodically inspect and replace hoses if bulges, kinks, cuts, wear, or leaks are found.
- Turn the cold water faucet off and remove the washer inlet hose. Remove the old rubber washer from the inlet hose and replace it with a new rubber washer.

- Attach a 2 ft. (0.6 m) inlet hose to a cold water faucet. Screw on the coupling by hand until it is seated on the faucet. Then, attach the “Y” connector to the male end of the 2 ft. (0.6 m) inlet hose. Screw on the coupling by hand until it is seated on the connector.

- Using pliers, tighten the couplings with an additional 2/3 turn. NOTE: Do not overtighten. Damage to the coupling can result.

- Attach one of the 5 ft. (1.5 m) inlet hose ends to the “Y” connector. Attach the washer cold inlet hose to another side of the “Y” connector. Screw on the coupling by hand until it is seated on the connector. Using pliers, tighten the couplings an additional 2/3 turn. NOTE: Do not overtighten. Damage to the coupling can result.

- Remove the protective cap from the water inlet valve. Attach the other ends of the long hose to fill the valve at the bottom of the dryer back panel. Screw on the coupling by hand until it is seated on the fill valve connector. Using pliers, tighten the couplings an additional 2/3 turn. NOTE: Do not overtighten. Damage to the coupling can result.
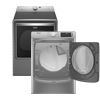
Note: The water connection to the dryer for steam is on the right-hand side of the back of the dryer. If you have a gas dryer, the gas connection is on the left side.


- Check that the water faucets are turned on.

- Check for leaks around “Y” connector, faucet, and hoses.
 .
.
See your Installation Instructions if you have further questions on the connection of the water line for your steam dryer.
Still need help? Contact us or schedule service.
Please contact us or click below to make an appointment from our preferred list of service providers for service on your appliances.
United States
Canada
Interested in purchasing an Extended Service Plan?
Please click below to learn more on how you can save up to 25% on New Appliance Extended Service Plans within 30 days of your appliance purchase.
United States
Canada