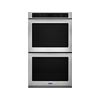
Not Draining - Wall Oven
Possible Solutions
To ensure that no residual water is left behind, the Drain function can manually drain the boiler. The drain function can be accessed "Maintenance" section of the display.
Is the Oven still hot?
If the temperature in the boiler is above 140°F (60°C), the oven will not start the Drain function. Once the temperature has dropped below 140°F (60°C), it will begin to drain automatically.
Was the water container emptied?
Empty the water container and return it to its compartment before using the Drain function. If the water container was not emptied, the drain cycle will not start.
To Empty the water container: Slowly lift and pull the water container out of its compartment toward you, keeping it horizontal to allow the remaining water to drain out of the valve seat.
Was the Oven calibrated?
The oven must be calibrated before use. The boiling temperature of water is dependent on the air pressure. It boils easier at high altitudes than at sea level. During calibration, the oven is automatically configured to the current air pressure ratios at the present location. If the oven is permanently installed in the house, it should only be necessary to calibrate it once. However, if the oven has been moved to a new location where the altitude may have changed, it must be recalibrated before use.
To Calibrate the Oven:
- Be sure that the water container is filled to the “MAX” mark with fresh tap water.
- Press ON/HOME.
- Press the up or down buttons until “Maintenance” is selected on the display, then press OK to confirm.
- Press the up or down buttons until “Calibrate” is selected on the display, then press OK to confirm. IMPORTANT: Do not open the door until the entire calibration process is complete.
- Press START.
- Press BACK to exit the settings function when you are done.
- After calibration is complete, let the oven cool and wipe dry the damp parts.
- Empty the water container and return it to its compartment before closing the oven door.
Still need help? Contact us or schedule service.
Please contact us or click below to make an appointment from our preferred list of service providers for service on your appliances.
United States
Canada
Interested in purchasing an Extended Service Plan?
Please click below to learn more on how you can save up to 25% on New Appliance Extended Service Plans within 30 days of your appliance purchase.
United States
Canada


